
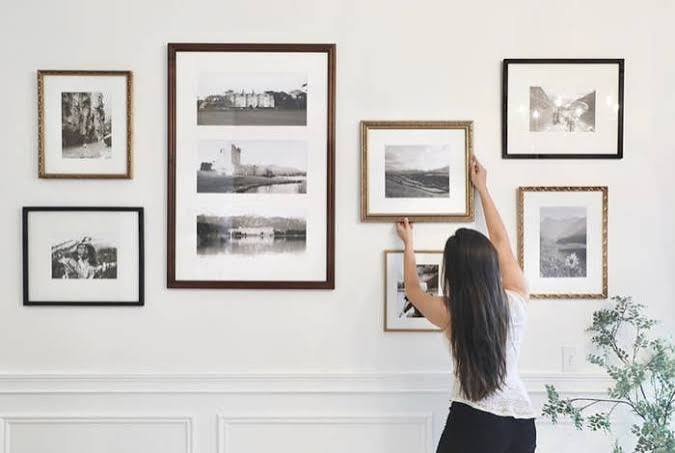
A good gallery wall makes a room feel personal. It brings together photographs, art, prints and small treasures into a collection that tells your story. A bad one looks like a scatter of crooked frames and extra holes in the plaster. The difference usually lies not in the art but in the planning. With a bit of preparation, you can hang a gallery wall that looks intentional and feels effortless.
Choose a theme or a thread
A gallery wall looks cohesive when something ties the pieces together. It could be a color palette, a consistent frame style, a subject such as travel or family, or a mix of eras with matching mats. You do not need uniformity. Contrasts in size and shape add interest, but a common thread keeps the display from feeling random.
Decide where it goes
Pick a wall with room to breathe. Popular locations include above a sofa, along a staircase, in a hallway or above a bed. When hanging over furniture, aim for the entire arrangement to span about two-thirds to three-quarters of the furniture’s width, which helps it feel proportionate. Leave several inches of clearance between the bottom frame and the top of the furniture.
Gather and mix your pieces
Lay out your art on the floor, a large table or a bed. Combine different sizes, orientations and depths. Include one or two larger statement pieces to anchor the layout, and surround them with medium and small items. Mix frame finishes if you like, but limit yourself to two or three to avoid chaos. Consider using mats to unify very different images.
Plan the layout with templates
Before you pick up a hammer, trace each frame onto kraft paper or newspaper and cut out the shapes. Mark where the hanging hardware sits on each template. Tape the templates to the wall with painter’s tape, and rearrange them until you like the composition. This lets you adjust endlessly without a single hole. Step back and look from across the room, and take a photo, since a picture often reveals imbalance you did not see in person.
Spacing and height
Consistent spacing makes a gallery wall look polished. Many designers leave about two to three inches between frames. Whatever you choose, keep it consistent. As for height, a common guideline is to center the display at roughly 57 to 60 inches from the floor, the typical eye level used in galleries. For a wall above furniture, place the lowest frames around six to ten inches above the piece. If your ceilings are very high or low, adjust to feel natural.
Layout styles
- Grid: frames of equal size aligned in rows and columns, a neat and formal look.
- Salon style: an organic, floor-to-ceiling cluster with mixed sizes and tight spacing.
- Linear: pieces aligned along a horizontal or vertical axis, ideal for hallways and staircases.
- Central anchor: a large piece surrounded by smaller ones.
Salon style is the most forgiving, while the grid demands precision.
Hang with the right hardware
Use hardware rated for the weight of each piece. Lightweight frames can hang from small nails or adhesive strips, while heavy frames and mirrors need wall anchors or screws into studs. Picture hooks and a level help keep things straight. Start with the center piece and work outward. Measure carefully from the top of each frame to the hanging point so that the tops align as you intended.
Hanging without damage
If you rent or want to avoid holes, use adhesive picture strips, which hold lightweight frames when applied correctly and removed slowly. Follow weight limits strictly, and clean the wall surface before applying them. Another option is to use a picture rail or ledge shelves where frames lean, which also makes swapping art easy. Small nail holes are often considered normal wear and tear in rentals, but check your lease and ask your landlord before drilling into walls.
Finishing touches
Stick small bumpers on the bottom corners of frames to keep them from tilting. Add a few non-framed items, such as a mirror, a woven piece or a small shelf, for variety. Keep the lighting in mind. A picture light or a nearby lamp can make the display glow.
Let it evolve
A gallery wall is not fixed. You can swap in new pieces as you find them. Leave a little extra space to grow, and enjoy building something that reflects your life.