
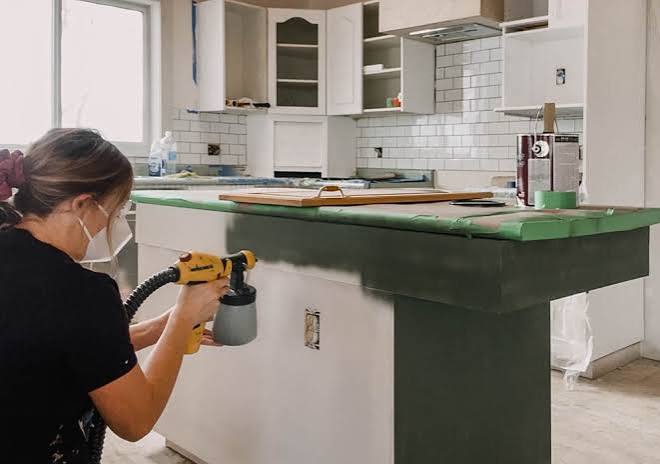
New cabinets can eat up most of a kitchen budget. Painting the ones you already have is a much kinder option, and when done properly, the result can look like a full remodel. The catch is that cabinets are among the hardest-working surfaces in the house. They are touched with greasy fingers, steamed by pots and wiped down constantly. A rushed paint job will chip within months. A careful one can last for years. The difference is almost entirely in the preparation.
Decide whether painting is the right move
Painting works best when the cabinet boxes are solid and the layout works for you. If doors are warped, water-damaged or falling apart, or if the layout frustrates you every day, painting will not fix those problems. Solid wood and well-built laminate or thermofoil cabinets can often be painted with the right primer, though thermofoil that is peeling is a poor candidate. Think about how much time you can invest. A typical kitchen can take a week or more of evenings and weekends, plus drying time.
Check for lead paint first
If your home was built before 1978, old layers of paint on the cabinets may contain lead. Lead dust from sanding is hazardous, especially for children and pregnant women. Use a lead test kit before you sand or scrape. Federal rules in the United States require certified practices for contractors disturbing lead paint in pre-1978 homes, and homeowners doing their own work should follow safe methods or hire a certified professional. If lead is present, do not dry sand. Seek guidance from your local health agency.
Gather your supplies
You will need a screwdriver or drill, painter’s tape, degreaser, a scuff sanding sponge or fine sandpaper, tack cloth, wood filler, a high-adhesion bonding primer, a durable cabinet-grade enamel paint, a quality brush and a small foam roller or paint sprayer, drop cloths and a respirator when sanding or spraying. Invest in good products. Cabinet paint is formulated to cure into a hard, washable finish, which standard wall paint cannot match.
Step 1: Remove and label
Take off doors, drawers, hinges and hardware. Label each door and its location with painter’s tape, and note which hinges go where. Store hardware in labeled bags. Lay doors flat on sawhorses or a table so you can paint them evenly without drips.
Step 2: Degrease and clean
Kitchen cabinets carry a layer of invisible grease. Paint will not stick to it. Scrub every surface with a strong degreaser, rinse with clean water and let it dry. Pay attention to areas near the stove and around handles.
Step 3: Repair and sand
Fill holes, dents and old hardware holes with wood filler. Let it dry, and sand smooth. Then lightly scuff all surfaces with fine sandpaper or a sanding sponge to dull the sheen and give the primer something to bite. You do not need to strip to bare wood in most cases. Wipe away the dust with a tack cloth or damp rag.
Step 4: Prime
Apply a bonding primer designed for slick or previously finished surfaces. On wood with strong tannins, such as oak or cherry, choose a stain-blocking primer to prevent bleed-through. Use thin, even coats and follow the drying times on the can. Lightly sand the primer once dry for an extra smooth finish.
Step 5: Paint in thin coats
Apply two thin coats of cabinet enamel rather than one thick one, allowing proper drying time between coats, and sanding lightly between them with fine sandpaper if the label recommends. Work with the grain, use long, even strokes and watch for drips. A foam roller on flat areas and a brush in corners and details produces a smooth finish. If you have a sprayer, practice on scrap first and ventilate thoroughly.
Step 6: Let it cure
Paint may feel dry in hours, but it takes days to weeks to fully harden. Avoid rehanging the doors too soon, and handle them gently. Add small rubber bumpers inside the doors to prevent sticking and chipping. Resist heavy cleaning for the first few weeks.
Step 7: Reinstall and update hardware
New knobs and pulls make a dramatic difference. If you change the hole spacing, fill and repaint the old holes first.
Common mistakes
Skipping the degreasing, using the wrong primer, applying paint too thickly, painting in humid or cold conditions and rushing the cure time are the main culprits behind peeling and chipping.
If you rent
Do not paint a rental’s cabinets without written permission. Even with a landlord’s approval, ask what finish is acceptable and whether you will be expected to restore them when you leave.